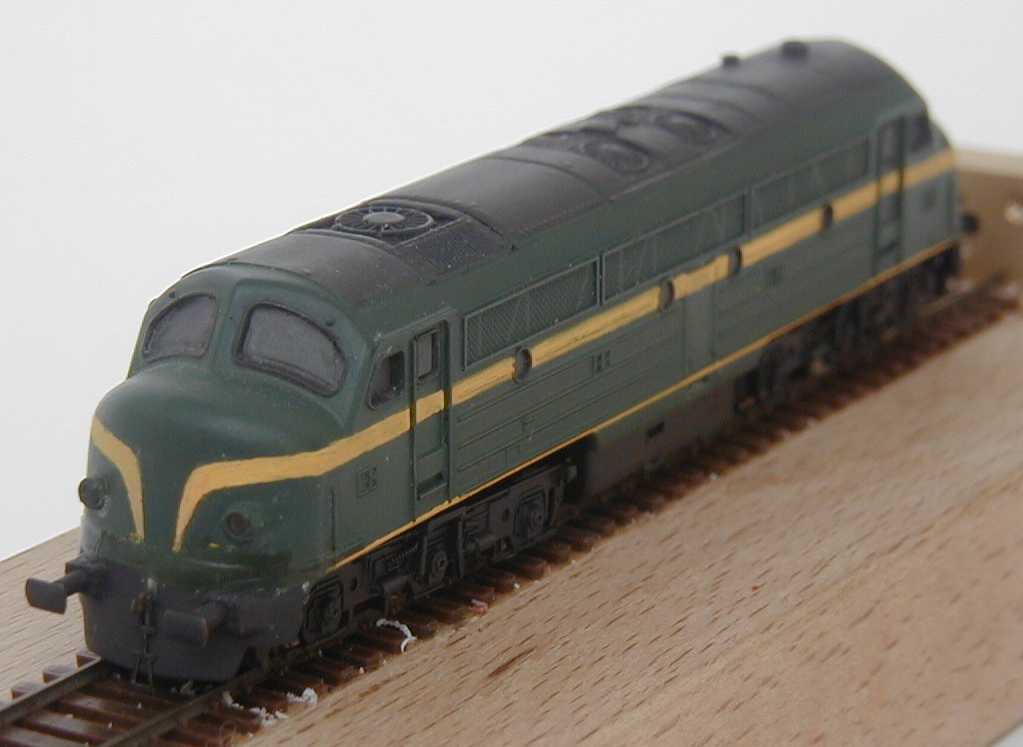
Producing a Nohab diesel from the Minitrix look-alike
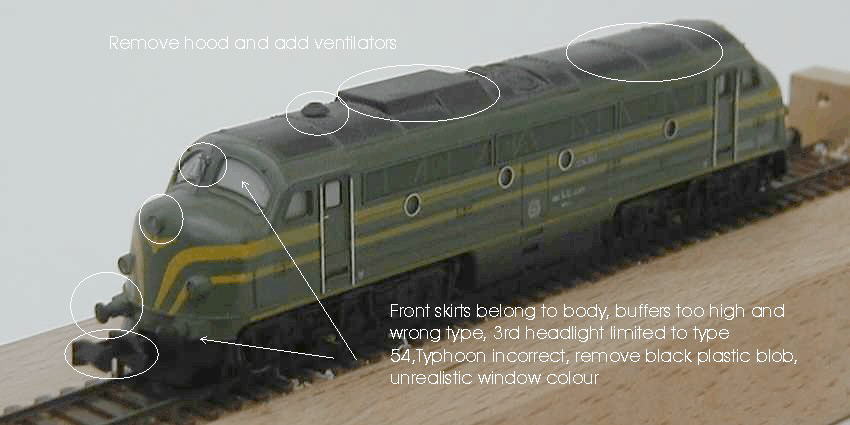
Photo 1 shows the raw product, only the most obvious of the many errors are highlighted. This is the old version from 20 years ago. The current model is virtually unchanged, making clear that they don't take the market serious.
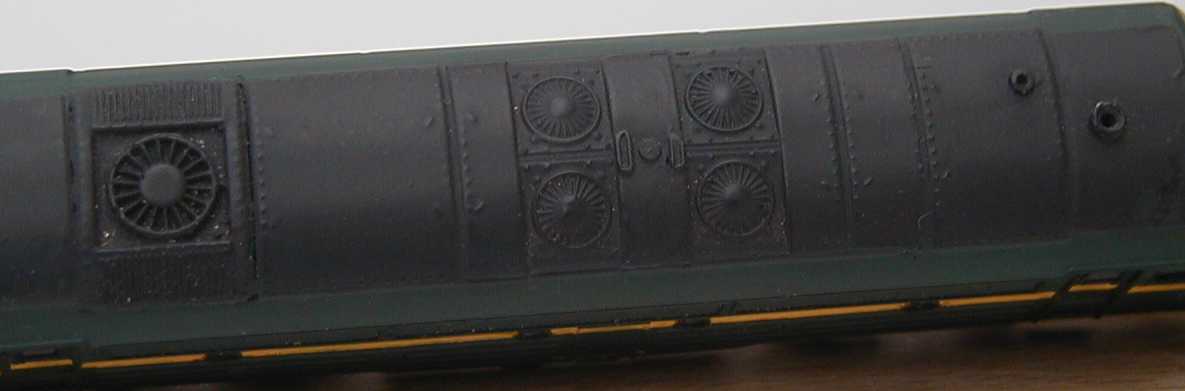
We can correct most of the errors with some work. First we can add all the missing ventilators and air-inlets. Thus start making a copy of the 2 original ventilators using 2 component silicon rubber. Then the square hood is cut out with a piercing saw. Using your mould add 2 new ventilators. I used 2 component UHU glue and casted the ventilators directly in place. Then cut out the space for the third ventilator for the air-cooled brake and its 2 air inlets. You have to find a new ventilator from a different model. This one rather looks like a spoked wheel and is not entirely correct either. Note that not all Nohabs (in Belgium) have this set of ventilators.
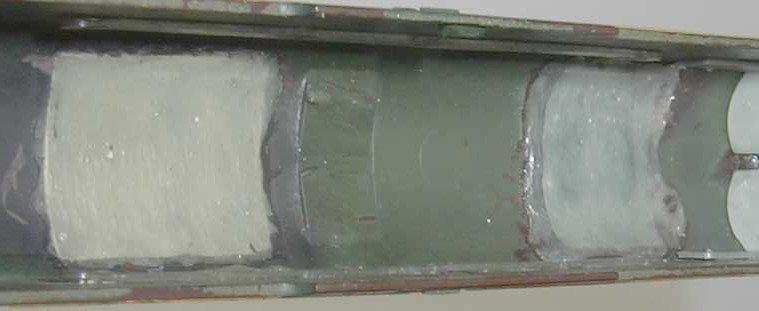
The next photo gives the inside.
Keep everything as thin as possible as there is only 1 mm space to spare.
The next step was replacing the front skirts. First remove the N-coupling from the bogie. If you cut off the skirts then the bogie will fall apart, because you have to shorten it as well to make it move in side the skirts.
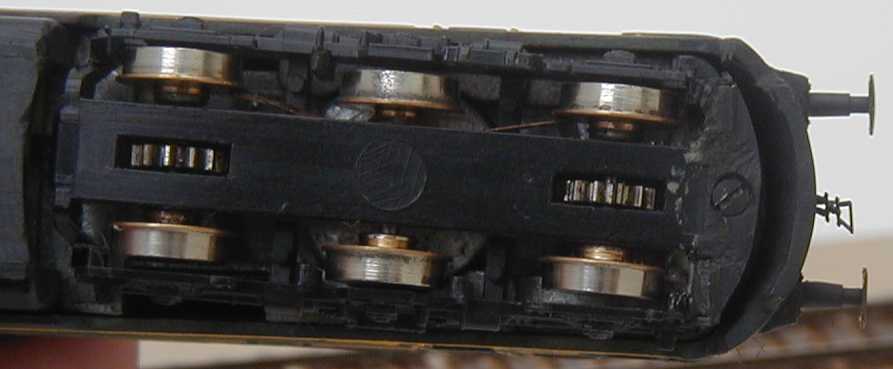
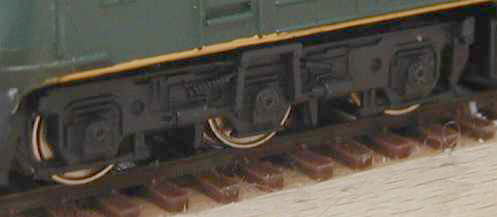
Thus first drill a new hole in the bogie underside and thread M 1 and put in a fixing screw. Then cut off the skirt with a piercing saw. Fill up the front of the bogie part with Milliput to keep it together. Take care that it can rotate a little bit (depends on the track radius). The lower photo shows the bogie. And yes the wheels are very filty but do also show that only the flanges have been thinned on the inside. The photo of the frame shows part of the bogie front and the Milliput filling.
You can then fix the skirt to the body, using a thin backing of plastic and filling up with lots of Milliput. After the necessary sanding and use car filler to smooth the front. Then cut off the buffers and refix them in the right place. Turn new buffers on the lathe or minidrill and use a file to produce the rectangular type.
You then get something like this
You can see the modifications. This wasn't the best model I had available, but a try-out for more to follow. I made the error of first painting the green and then the yellow. Do it the other way round. First paint it completely yellow and then spray the green. Yellow is a difficult colour to get a good cover where as green covers very well. It needs a full repaint but the livery is pretty difficult to get right. When fixing the MFK coupling do use the hook only. The loop cannot go under the body here, making it more difficult to couple. When the loop is missing it is easier to add all the hoses for brake and steam pipes. They will follow in due time after restoring the livery. Adding a gloss coat to windows would help but the better option is to use clear plastic inserts. Missing are the steps below the body sideways from the bogie.
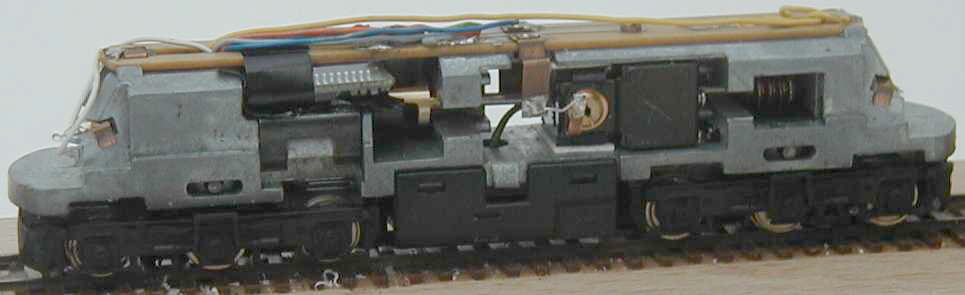
This is the inside showing the new Mashima motor and the Lenz 040 decoder. This is good combination but nowadays there are newer decoders with probably better performance. (don't go for a L010XF that is a bad choice).
Don't waste too much time in making the wheels completely fiNe-scale, a good blackening or some camouflage paint suffices here.
copyright: Henk Oversloot, 21-october-2001