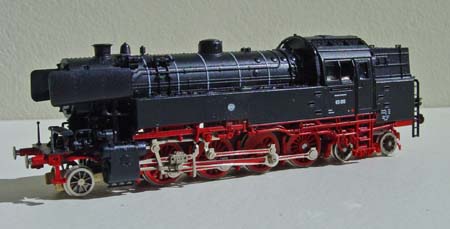
This page gives some hints on fiNe-scaling commercial chassis that can be used for models that come with reasonable to good running properties. In this cases it is sufficient to modify the existing wheels to a finer standard without extensive rebuilding of the entire gear train. The loco is of 2-8-4 (1D2) formation thus has two bogies. The original wheels of these are not of any use because you cannot see through and are of a construction that fiNe-scaling these is a waste of time. Thus we need new wheels.
Here we make use of the new technology that came available over the last years. The latest developments involve lasercut wheel centers in an unusual material namely cardboard.
This concerns a special type adapted to the laser cutting process. The advantage of cardboard is that is easily reinforced by immersion into thin cyanoacrylate glue leaving a strong plasticized wheel center. Jens Emmermann developed the wheels and fiNe-tuned the proceedings giving the centers used here. The possibilities of this process are demonstrated with the following photos:
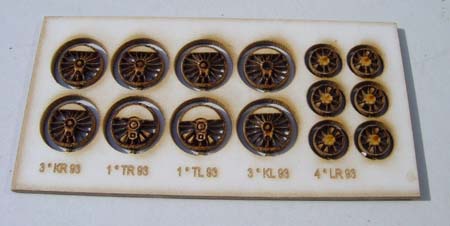
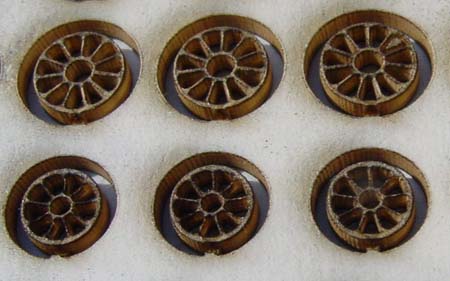
A complete wheelset for a Br93 on the left and right we see a close-up of a set of bogie or wagon wheels
These are only the centers of course. After the reinforcing with super glue the wheels can be worked upon with tools. To finish the center the wheel is put on a 1mm axle. The opening can be carefully enlarged using broaches or reamers to a tight fit on the axle. Mounting the wheel in a reversable minidrill and using a rubber grinding wheel in a second minidrill gives a careful control for adjusting to true running by grinding any unevenness and wobble away. To finish this item into a wheel you need to fit tyres. The above running wheels fit the 2mm SA tyres from the plain 6mm and 5 mm wagon wheels. However if you have access to a lathe you may fit your own home turned tyres, which is what I did by turning these from Nickel-Silver bar. Another approach could be to use these centers as for moulding process for casting. The wheels have slightly tapered spokes and rims which makes them an excellent starting point for such a process of lost wax. Also adapting such centers to the amount of shrink in the lost wax process is a matter of minutes on the computer.
An alternative approach was taken for the front bogie wheels because this can be more easily adapted to full electrical contribution. These concern spoked centers using double cutting blades in the milling machine. The latest improvements are smaller wheelcenter which is possible by using a smaller stub axle diameter of 1.2 mm, already prefinished before cutting the spokes. That is because the spokes are only 0.15mm thickness which makes it difficult to finish the wheel without distorting the spokes using normal lathe tools. Also care must be taken that the internal strain in the material doesn't lead to distortion when too much heat is applied when the soldering of the rim to the spokes.
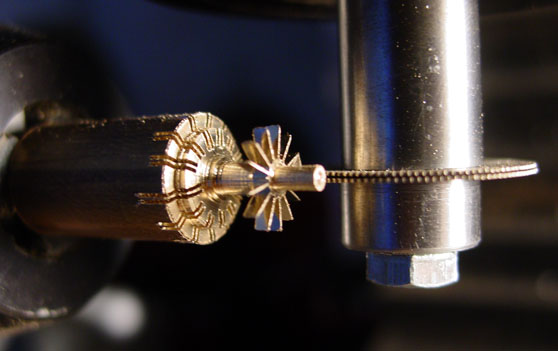
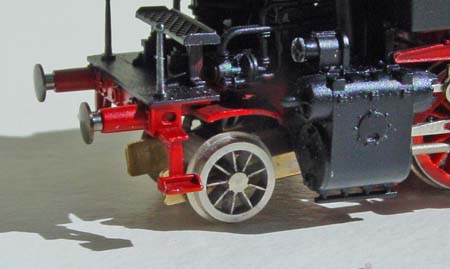
The basic process and the finished product on the loco.
The main driving wheels are converted using the standard process of fitting a new rim to the existing wheels and cutting off the surplus from the back of the wheel. For the wheels with traction tyres the whole wheel tyre was replaced by a new one.
The original motor was replaced by a better product in this case a 1016mm Faulhaber coreless motor. This happened to one that had seen use before thus was double ended and already had a small flywheel. However as this is a big loco we can easily put the usual bell shaped flywheel for better runnign properties in front. Strictly a single ended motor would be sufficient. Initial calculations showed that if the motor was horizontal there should be enough space on top of the motor for a dekoder. Therefor the flywheel was not maximised also because this doesn't add much when a good decoder is fitted. The flywheel has an outer dimension of 14 mm and a length of 9 for the main body with an extension at the front for the worm. This is turned from a single piece of brass but the worm could be just as well on an axle fitted into the flywheel.
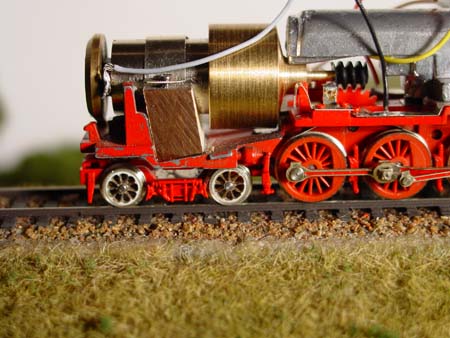
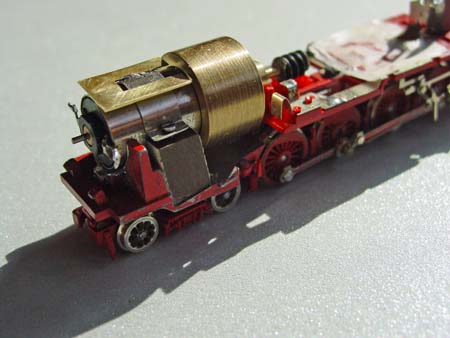
Left: early views of the motor fitting during test runs
Right: this photo show the platform mounted to metal band for fixing the decoder. The small flywheel is taken off for mounting the decoder.
The original motor mount is reduced in height by drilling a large 10 mm hole from the back of the loco. For this the entire chassis is simply clamped vertically under the milling head. A new motor mount is added to fix the new motor. Experiments showed that using the new motor and flywheel the weight balance was around the 3rd driving wheel. In order to make the imbalance not any bigger a leightweight material was chosen for the new motor mount. In this case a piece of trespa was chosen for no other reason than that is was available in the right dimensions. Trespa is excellent material for milling and tapping and can be compared to Tufnol but has finer structure. The motor is fixed into the Trespa block by a set of M 1.2 screws and a precurved metal band.
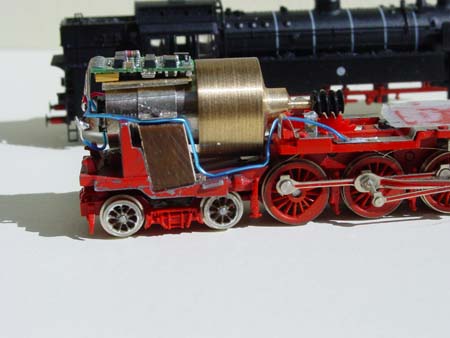
decoder mounted onto the platform
A Zimo MX62 is fitted to the platform. This decoder is 2.5 mm thick and just fits the available height. A DC74 would give another 1 mm extra space that may be welcome. As it comes to comparing the default modes of these decoders the Zimo has considerably lower speed but the motor produces slightly more tones. However both decoders are imminently suited for use with this type of motor and fiNe-tuning the parameters will lead to comparable performance.
The loco on its new chassis, the buffers will need extensive work to ride the exact height. Both are about 1.25 mm too high while the boiler is at the right height.


