Building your own wagons is not usual in N-gauge. Most people think that building anything yourself in N-gauge is impossible. That is of course absolute nonsense. The fact is that it is much easier to built a wagon than a small house or locomotive. What you need in the first place is some kind of drawing. If it is in an queer scale, like 1:87 or such, then scribble all dimensions you are going to need into it. Of course photographs come in very handy too because actual wagons generally differ from drawings. They also give information on painting and weathering. You will allways find out that you have incomplete information on the subject as some parts always seem to be hidden from view.
Unless you want to model a wagon
in use as shed all wagons normally have at least 2 axles and 4
wheels. So you need to decide which ones to use and how you are
going to fix these.
Wheels:
you can either make your own with a lathe or buy these from a
main supplier and use as half fabricate in minidrill operation.
The axle bearing parts you can make up from folded or soldered
brass sheet. If you become member of the 2 mm Scale Association
you can use a limited amount of components. Such as wheels,
tophat bearings, axle frames and some type of springs and
axlebox. I'm not aware that there are useful components on the
german market so in general you have to copy springs and axlebox
parts from other wagons or built your own master. As wagonbottom
you can use a piece of 1 mm thick brass. On this you can solder
the axle bearing parts. Alternatively you can make a compensated
axle to get a three point suspension. (The compensated axle can
rotate slightly around a vertical plane through the centerline
and results in better track keeping theoretically) On well laid
track it is hardly worth the effort. If you make your bottomsheet
slightly smaller than your wagon then you can glue the solebars
and bufferbeams against this sheet. A two component epoxy will
bring help here.
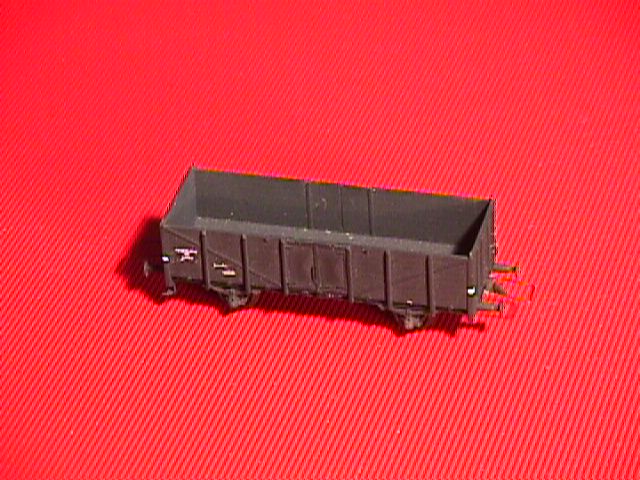
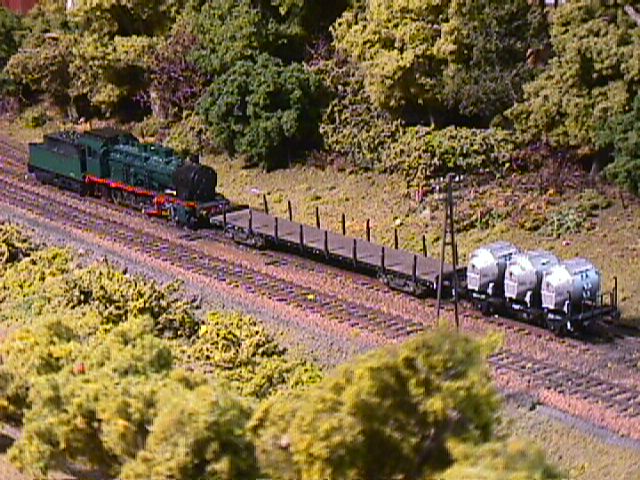
Flat and open wagons are easiest to start with. An open wagon is nothing more then 4 walls sitting square around a bottom. I find in general easier to fit the ends against the sides. One of the fotos shows a NS darkgrey (they call it blue!) GTm wagon. This is built entirely from plastic with a piece of lead at the underside for weight. The (compensated) axles and bearings are 2 mm SA components. Started was with a long strip that was scratched with planking using scrawker and scraperboard knife. Then the inside doors were indicated and the various parts cut to length. The inside floor was done in the same way. The parts were then glued together and detailing could start. These are mainly strips glued in the right place. The doors are of 0.1 mm sheet cut with a cross in the backside and folded along the line and flatted out again. You can then glue the along the rim and detail the edges with strip. In this case the strips carried nails. These can be made by rolling a sharp teethed cutting blade along a sheet and cutting parallel to this line into strip. Takes longer to write than to do. The eyelets for the ropes are made with a minidrill. First drill a .3 mm hole in a piece of rod or thick strip. Without taking the drill outof it, sand away the overscale thickness until you are left with a tiny tube and cut to pieces. Glue these pieces to your wagon. Handrails and steps can be made from thin springsteel and brass. This was my first wagon, building time was between 8-10 hours including developing the techniques. Compare it with an O12 and see the differences. The long flat HTS with rungs is another example this time built along a flat piece of brass for stiffness. The bogies are from brass strip with GFN sides glued to it. The bogies are screwed to the brass plate.
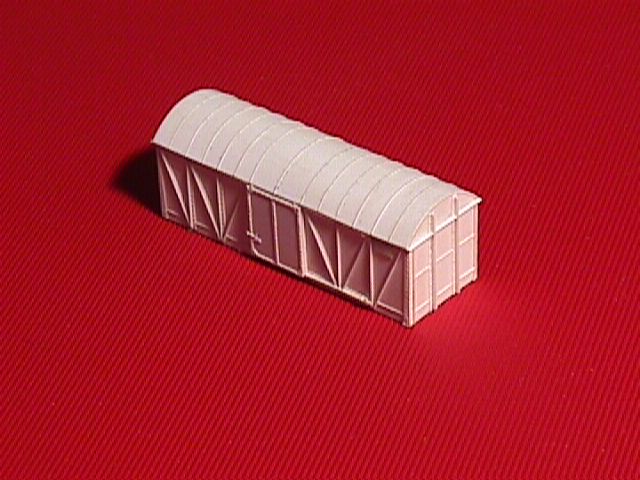
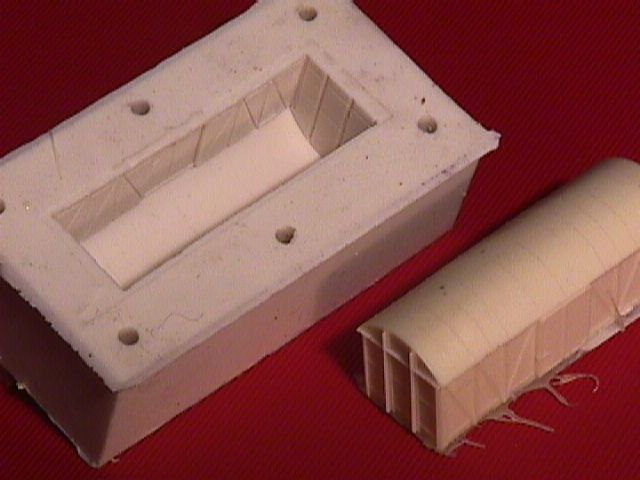
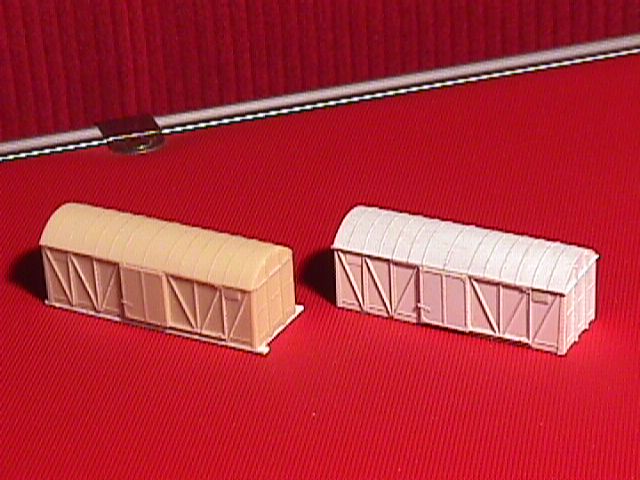
More difficult is the Belgian Gkkms , a closed wagon. In real life built in 1946/47 with profiles folded from sheetmetal. The roof is curved as described in the plastic section. In principle first glue a square box with 2 inside reinforcements for strength, then glue the roof on top and trim the oversize roof. After that glue all strips in place. The nails were individually pressed into the sheet with a sharp pin every mm. In this case the wagon is open at the underside. The sides, solebars and bufferbeams are in one piece because they were in the same plane. On the foto's you can see that I used the original model to make mould with 2 component silicone rubber. In fact it is a double mould existing of an inside and outside form. The foto's only show the outer mould together with a casted copy made in it using 2 component polyurethane. Depending on the number of fine details you can use such a mould upto 50 times to make a copy. Your mould will gradually deteriorate, which means that sometimes pieces of details wil tear off when you take out your casting. The mould is made by taping the model into a box made to size, leaving about 1 cm clear on all sides. After that silicon rubber is mixed and poured in the box. After 8-24 hours you can take your original out again. Of course you cannot make a complete model in it. You still have to finish each individual model with handrails, steps and such undercut details you cannot cast. But each raw casting takes only about 15 min to retrieve the state of the original which took 3 evenings to produce. I regularly use this copying technique to take shortcuts. For instance on Spaubeke the frontwall of the station is copy of the backwall. Saving some 300 individual cut pieces of plastic. In this case the mould is used only once but the timesaving was enormous making more than good the cost of silicone and casting materials. But you can use it to copy springs and axlebearings for your own models. Or to cast extra ventilators on roofs of diesels. Or built one diesel masterfront and cast two equal copies. Or use it to repair things. For instance a broken body by making a copy of the intact front. Another use is to make a backup of your work. If are working on a difficult model and the next operation has high risk of spoiling your work then first make a mould to preserve your work. Silicone rubber is expensive, about 30 euro a kg. The price of PU is even higher. Minimum quantities are often 1 or even 2 kg. Instead of PU you can also use epoxy or materials such as gipsum, or other stonecast materials, all depending on the object.
author: Henk Oversloot
date: 9 february 1999